Card Collection
Safely collect and encrypt card holder data with our pre-built card collection component. Card holder data that is encrypted with Evervault can be safely stored in your database and shared with third-party payment processors via Relay.
Demo
1{
2  card: {
3    number: "",
4    cvc: "",
5    expiry: {
6      month: "",
7      year: ""
8    }
9  }
10}
Getting Started
The Card Component is a secure iframe, hosted by Evervault, which you can embed in your product to collect card data. When your users input their card information, it will be encrypted within the iframe before being returned to your application where you can safely pass it on to your API.
Install the Evervault SDK
Our JavaScript SDK is distributed from our CDN, and can be installed by placing this script tag in the head of your HTML file. The SDK must be loaded directly from our CDN and cannot be bundled with your application or self hosted.
Once the SDK is installed, initialize it using your Team ID and App ID. You can find these in the Evervault Dashboard.
You can also install Evervault via the @evervault/js package on npm. This package is a light wrapper which handles loading the SDK from our CDN and also provides TypeScript definitions.
Frequently Asked Questions
You can customize the appearance of the Card component by passing a custom theme or extending one of our pre-built themes. Read more about customization.
Submit the encrypted card data to your API
The encrypted card values can be accessed from the card.values object or by subscribing to the change event with the card.on method.
Inside of your submit handler, you can access the encrypted card data and pass it to your backend.
Processing encrypted card data
Now that you have collected encrypted card data, you will need to pass it to a third-party payment processor. Since our intention is to keep card data encrypted at all times, we need a way to decrypt that data after it leaves our infrastructure, and before it reaches the third-party API. This can be done using a Relay.
Relay is a network proxy that can be configured to decrypt data during a request. If we proxy our request to a third-party endpoint through Relay, the encrypted card holder data will be decrypted, allowing the request to be processed as normal.
Create a Relay
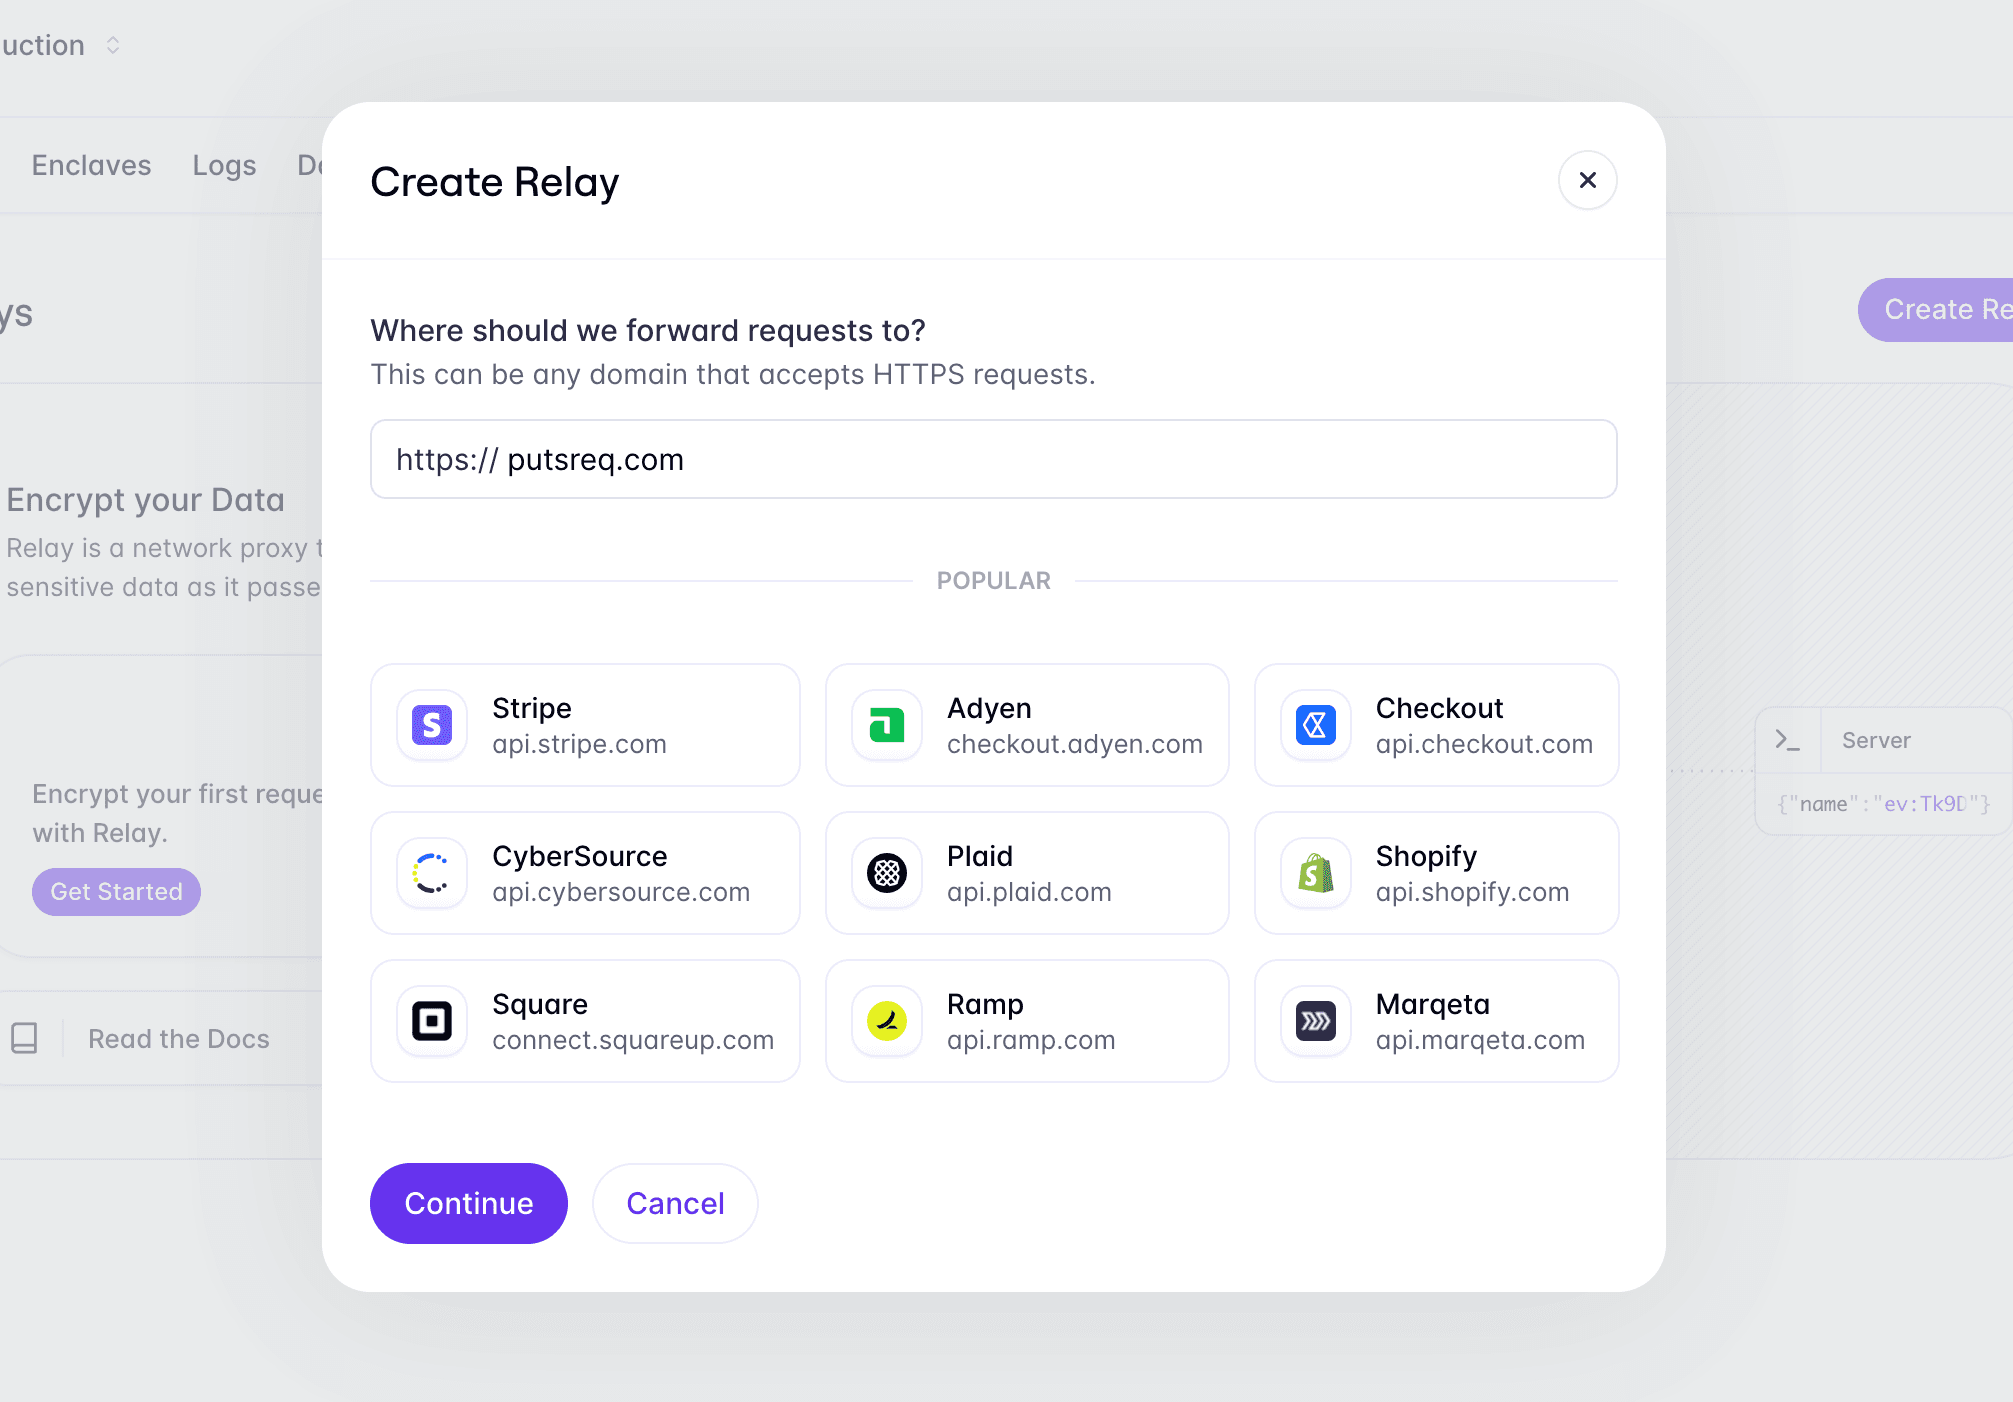
We'll use PutsReq to simulate a third-party API. PutsReq will give us a temporary endpoint that we can send requests to, however, in practice, this would be an endpoint from a third-party service.
To create a Relay for your PutsReq endpoint, navigate to the Relays tab in the Evervault Dashboard, click Create Relay, and add the PutsReq endpoint to the destination field.

Configure the Relay
By default, Relays are completely transparent proxies and will not decrypt any data. Relays can be configured to perform encrypt and decrypt operations on request or response. In our case, we want to use Relay to decrypt the encrypted card data on request as it's proxied to the third-party endpoint.
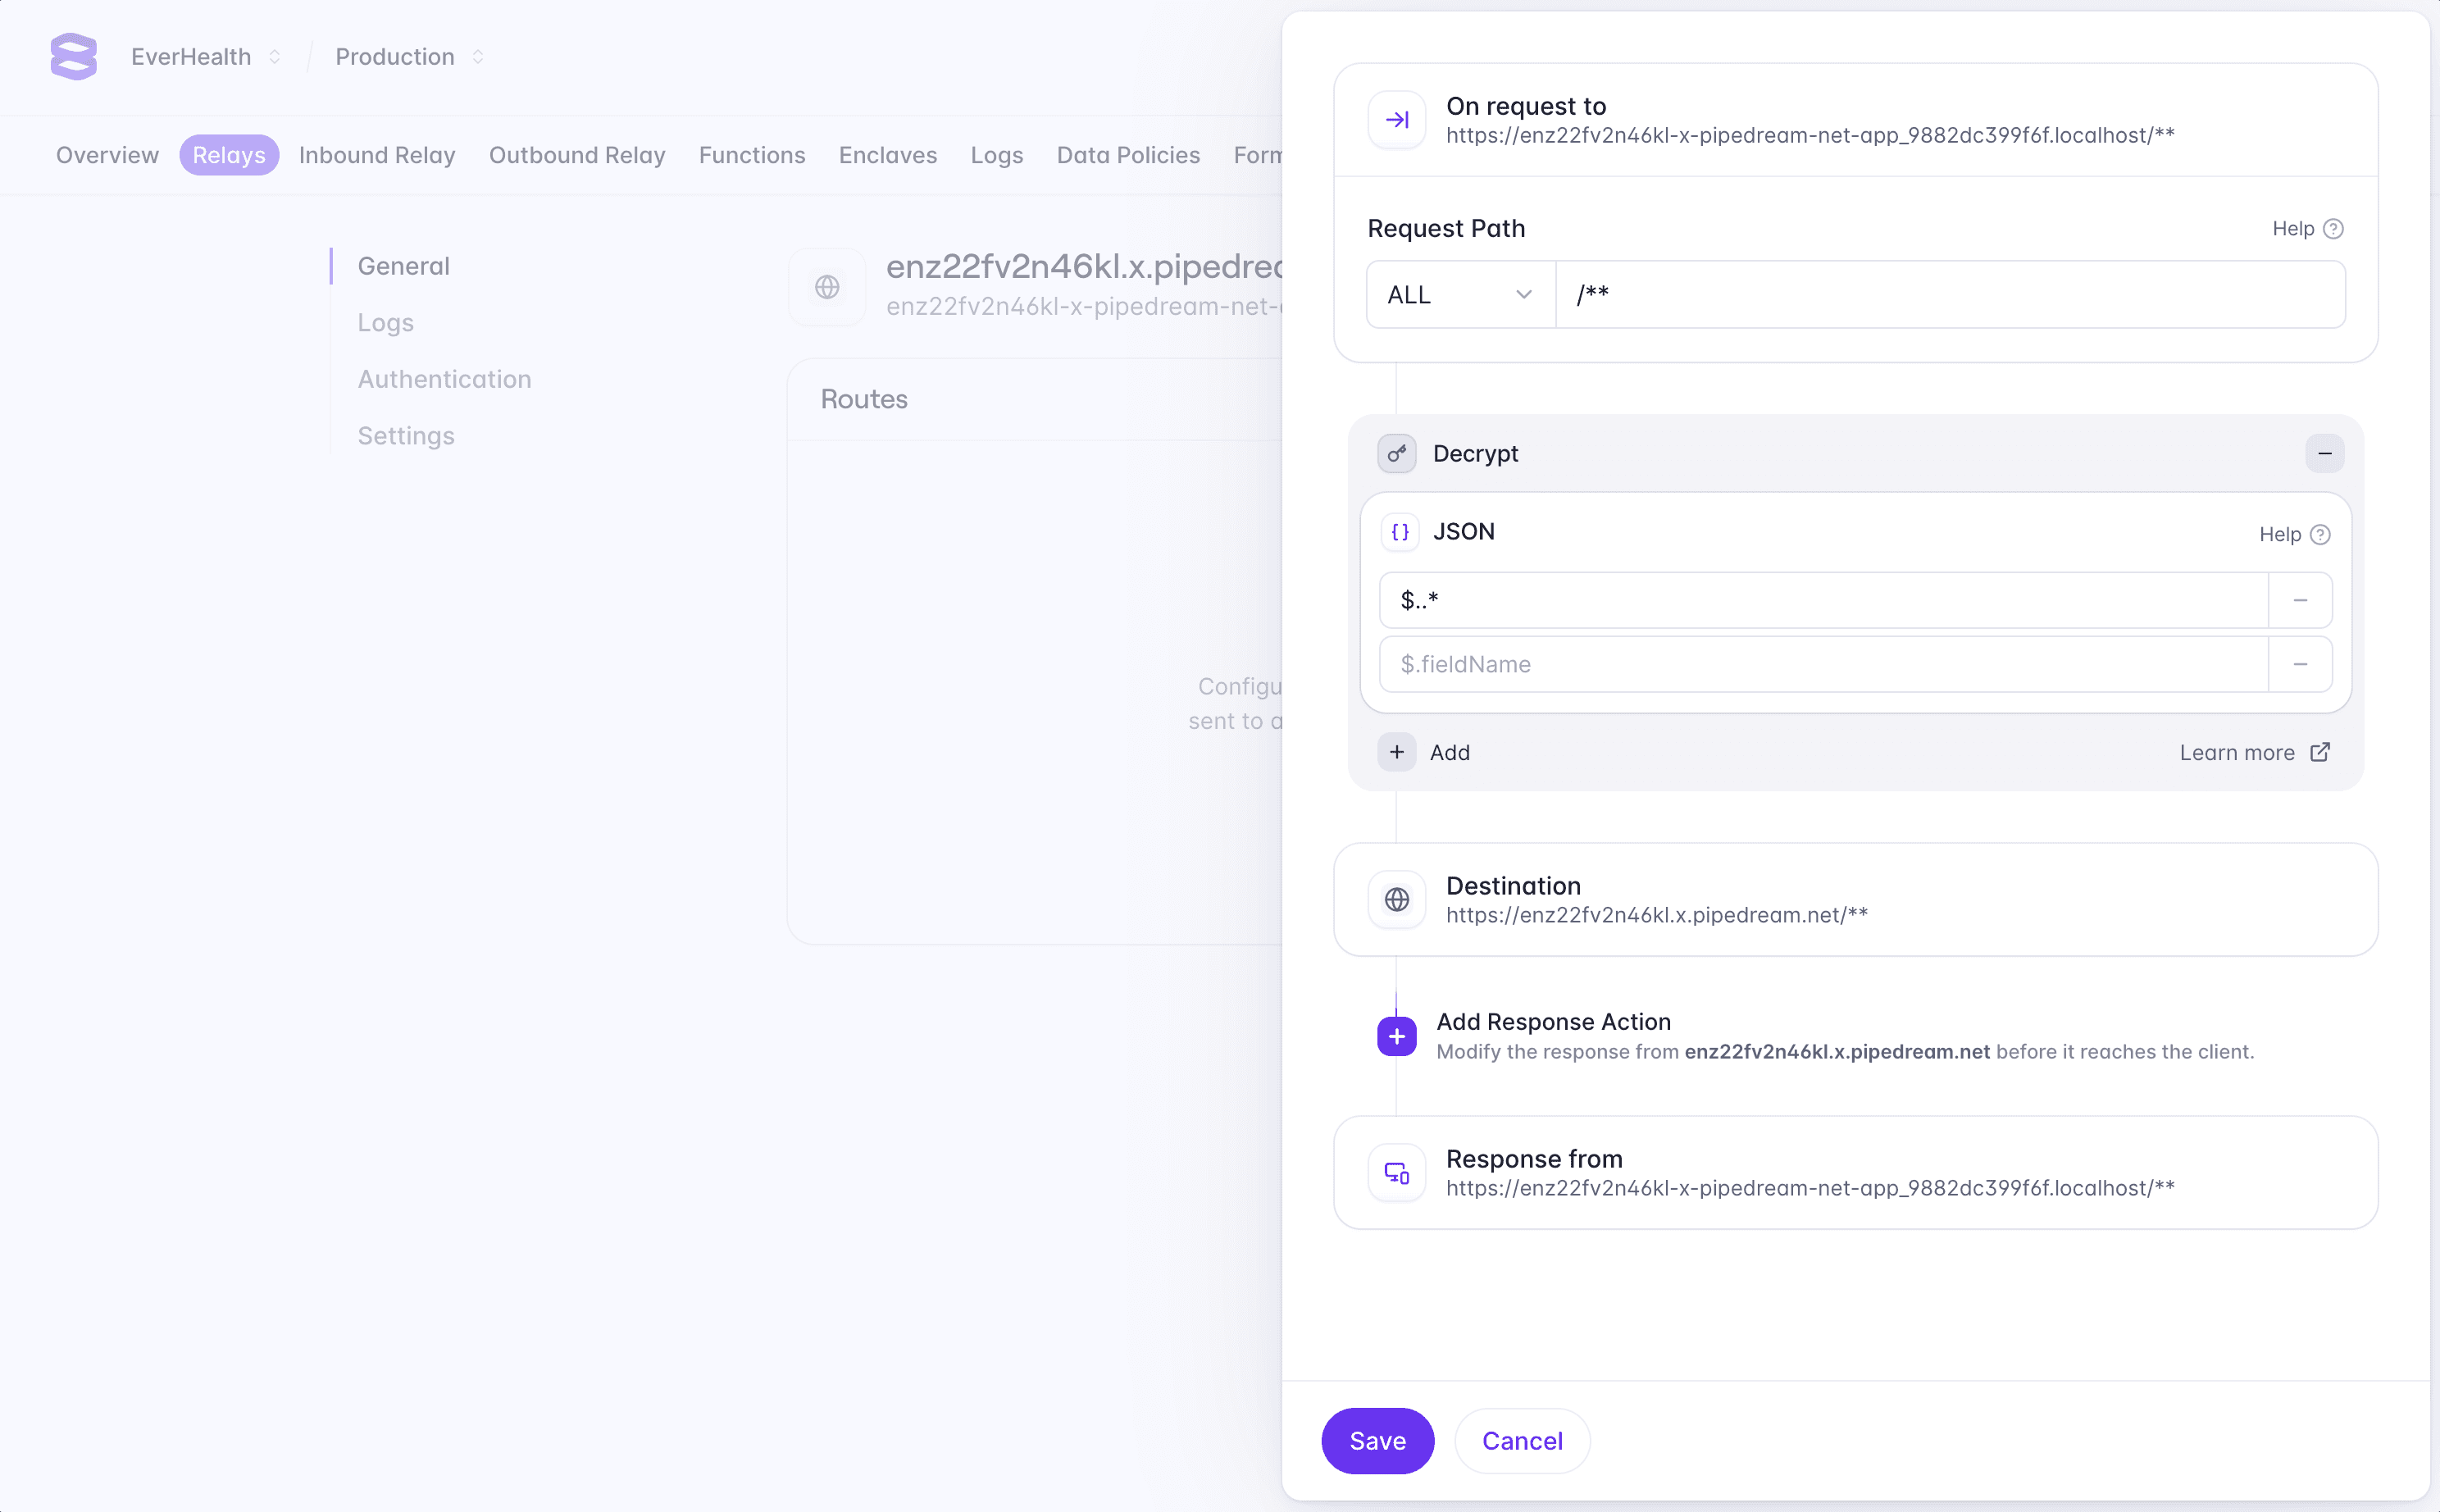
In the Dashboard, click the Add Route button to configure a new route. We want to decrypt any data being sent to this endpoint, so we can enter /** in the path field to match all requests sent to the Relay.
Next, we can add a request action to decrypt any encrypted data in the request body. Select Add Request Action -> Decrypt -> JSON, and enter $..* in the fields to decrypt. This will configure the Relay to match any encrypted JSON fields in the request body and decrypt them.
You can learn more about field selection in the Relay documentation.

Integrate Relay
Finally, we can implement our API endpoint to pass our encrypted card data to the third-party payment processor via Relay. By sending the request through Relay it will detect and decrypt the card data before it reaches the third-party API.
Relay authentication
Notice we are sending the X-Evervault-App-Id and X-Evervault-Api-Key
headers to the Relay. These headers are used to authenticate the request to
the Relay. We highly recommend enabling Relay
authentication when sending requests to third-party
APIs.
Customization
The Card component can be fully customized to match the design of your application. By default, the Card component will have no styling applied. You can use one of our pre-built themes to get up and running or build your own theme from scratch.
Pre-built themes
To help you get started, the SDK has three built in themes to choose from; clean, minimal, and material.
Custom themes
A theme is just an object with a styles property. This styles property uses a CSS-as-JS format to define CSS rules for the component. These rules will be compiled to CSS and injected into the iframe.
You can pass a custom theme as an argument to any of the pre-built themes to extend them.
Element Attributes
Although you can customize the CSS inside of the iframe, you cannot modify the HTML. We know that layout can have a big impact on style definitions and so to help with this, we apply custom attributes to various elements within the iframe. These attributes are prefixed with ev-.
You can see our premade UI Component themes for an example of how these attributes can be used when creating themes.
fieldset attributes
The following attributes are added to the `<fieldset />` tag that wraps the entire component.
The name of the component.
Whether or not all of the fields within the component are valid.
.field Attributes
Each field in the component is wrapped in a <div /> with a '.field' class and the following attributes.
The name for the individual field within the component.
Whether or not the field is valid.
Whether or not the input has a value.
Custom fonts
You can load additional fonts from Google Fonts by providing a fonts array in the theme definition. Currently, we only support custom fonts via Google Fonts.
Responsive Styling
You can define media queries inside of the themes styles object, however, this may lead to unexpected behaviour as the media queries will be matched against the iframe document, not the parent document. To get around this, we provide a media utility which allows you to define styles based on media queries that match the parent document.
To access the media utility you will need to define your theme as a function that returns a theme object. This function will be passed a utilities object as an argument, which contains the media utility. The media utility should be spread into the styles object of the returned theme.