Encrypt Data Collected in the Browser
As developers, we often need to encrypt our end-users’ data, and that data often originates in the browser. Evervault offers two methods to encrypt data that’s collected in the browser: using a client-side SDK, or using Relay.
Evervault offers client-side SDKs in JavaScript and React.js, each of which expose an encrypt() function which can be used to easily encrypt data directly in the browser.
Relay is a network proxy that can be configured to encrypt data that’s sent from your client to your server.
We’re going to cover both methods in the guide below.
Encrypt using an SDK
To encrypt data using React.js, you first need to install our React.js SDK.
You can initialize the React.js SDK by passing your TeamID and App ID to the <EvervaultProvider/> . Both IDs can be found in the Evervault Dashboard.
Once you've added the <EvervaultProvider>, you can access the useEvervault() hook in its children. The useEvervault() hook returns an object which includes an encrypt() function. The encrypt() function can can be used to encrypt plaintext data in your application.
Encrypt using Relay

Create a Relay
Relay is a proxy that can be configured to encrypt or decrypt data during a network request. In this example, we want to encrypt data that’s collected in the browser and sent to the server.
We’ll use a RequestBin endpoint as our Relay destination. In practice, this would be the base URL of your API. We can create a RequestBin by navigating to requestbin.com/r, where we will be given a temporary endpoint that we can send requests to.
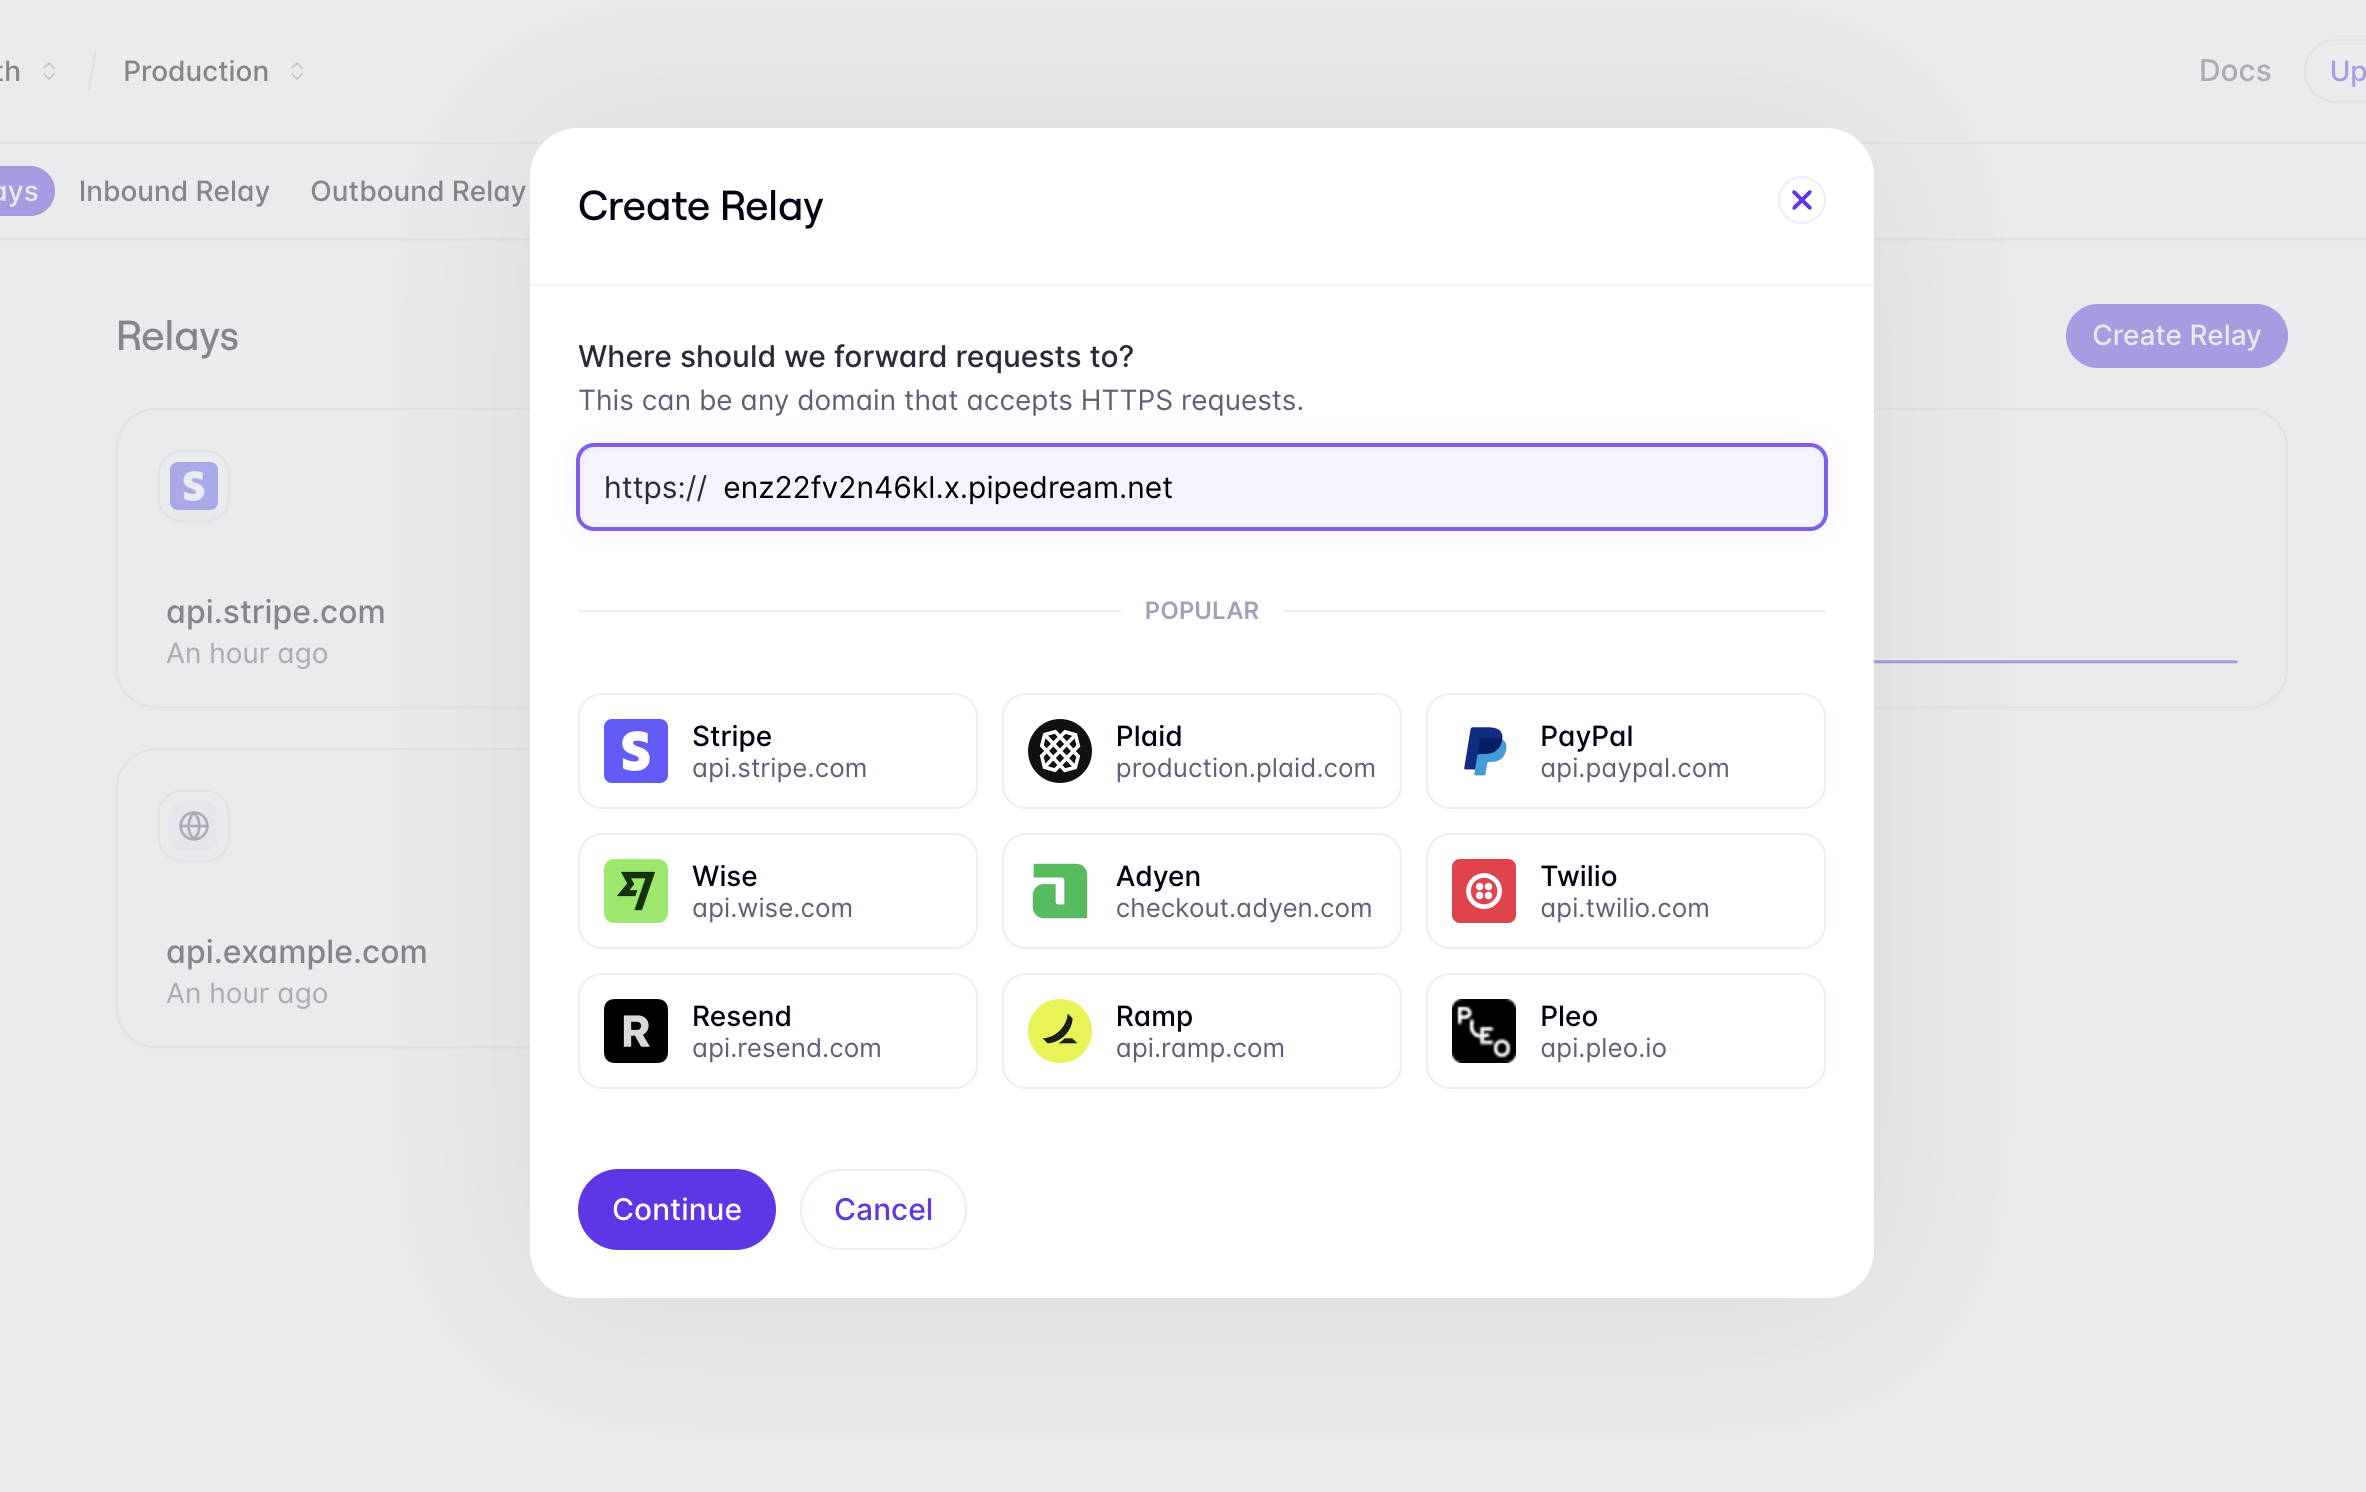
To create a Relay, navigate to the Relays tab in the Evervault Dashboard and click Create Relay. Add the RequestBin endpoint to the destination field.
Integrate the Proxy
When you create a Relay, Evervault provisions a Relay Domain that you can send requests to. This domain is available in the Relay dashboard, and takes the following form: [DESTINATION_URL].relay.evervault.app. Any requests that are sent to this domain will be proxied via Relay before being forwarded to the RequestBin endpoint that we created. To test the proxy, let’s send a POST request to our Relay Domain using cURL. We’ve included some dummy sensitive data (email and password) in the body of the request:
If you run the snippet, you’ll notice that the request appears in your RequestBin logs, but the values for email and password are still in plaintext. To encrypt these values during the request, we need to configure these fields to be encrypted by Relay on request. Let’s do that next.
Configure the Proxy
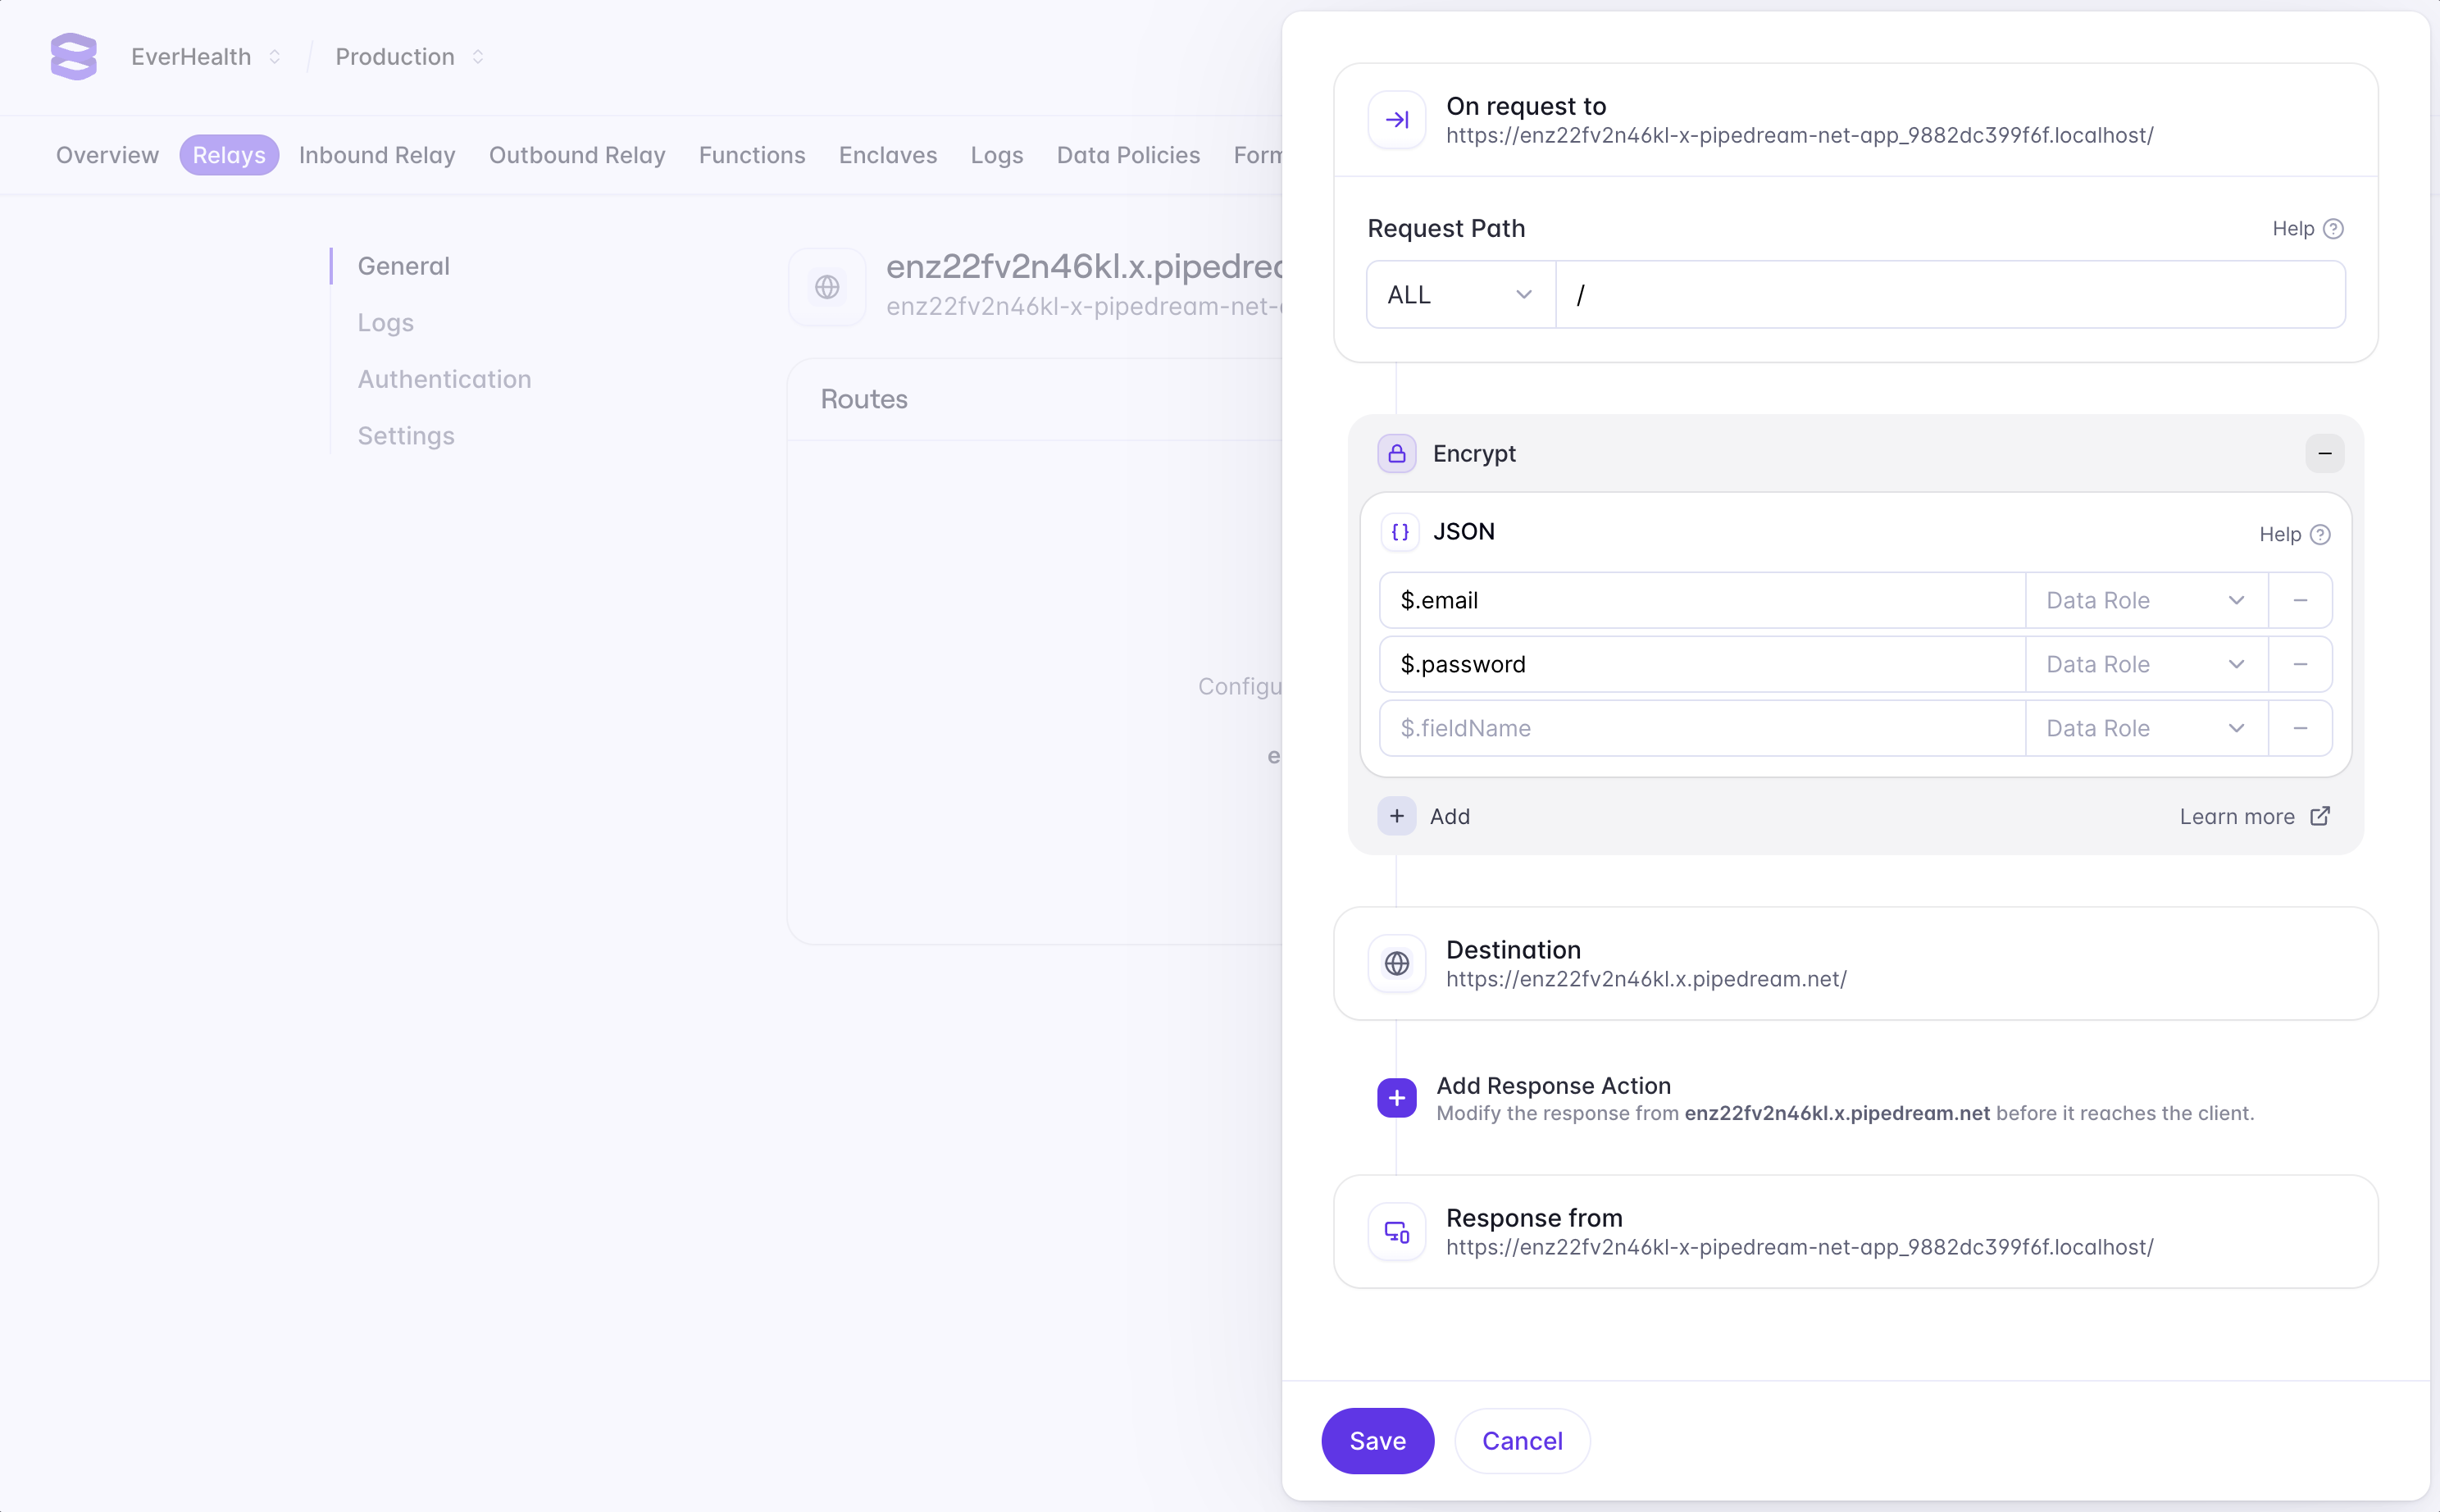
In order to encrypt values during the proxied request, we’ll need to tell Relay which fields we want to encrypt. In the Evervault dashboard, navigate to the Relay you created, and click the Add Route button to configure a new route. We are sending requests to the root path of our endpoint, so we can enter "/" in the path field to match this route. Next, we can add a request action to encrypt the fields that we want to secure. Select Add Request Action -> Encrypt -> JSON, and enter $.email and $.password as fields to encrypt.
If you send the cURL request again, you’ll notice that the values for email and password have been encrypted by Relay during the request.
Although we’re using a cURL request here, Relay can be called anywhere that you have access to a network request.
Summary
Using an SDK or Relay to encrypt data in browser is a particularly secure pattern, as it means that your server never handles sensitive data in plaintext. To secure sensitive data across your stack, you may need to decrypt, process or share encrypted data. We’ve outline some other common patterns below.